
Building and Running Fldigi on Raspberry Pi
Matt Roberts - matt-at-kk5jy-dot-net
Published: 2017-07-10
Updated: 2022-06-06
 Recent versions of the Raspberry Pi
single-board computers
feature enough CPU power to run the Fldigi
digital mode software. In particular, the RasPi 3 features a powerful
quad-core ARM CPU. This is an important step forward, because it allows
a low-power computer to do everything needed to add HF digial mode support to an
HF radio, without the need for a notebook or desktop computer. The RasPi
computers are small, and can be easily mated with a
touch screen
and just about any kind of keyboard, making a very compact, portable or mobile terminal
for digital modes.
Recent versions of the Raspberry Pi
single-board computers
feature enough CPU power to run the Fldigi
digital mode software. In particular, the RasPi 3 features a powerful
quad-core ARM CPU. This is an important step forward, because it allows
a low-power computer to do everything needed to add HF digial mode support to an
HF radio, without the need for a notebook or desktop computer. The RasPi
computers are small, and can be easily mated with a
touch screen
and just about any kind of keyboard, making a very compact, portable or mobile terminal
for digital modes.
One challenge with Fldigi, however, is that the packages traditionally included in the
Raspberry Pi OS repositories are quite old, while the Fldigi package changes
regularly. What I have found is that the best way to get Fldigi running on the
RasPi is to build it from source. This is a step-by-step guide on how to do this.
These steps should work with little or no modification on other RasPi distributions.
I have even used them for Ubuntu and
Linux Mint, so they should work on most Linux
distributions. The main differences, if any, will be in the package names of
prerequisites.
The Basics
This guide assumes that you have a Raspberry Pi, running a recent version of the
Raspberry Pi OS, and that you have already completed the
installation process.
It also assumes that you have the graphical desktop running, which you will need
to display the Fldigi GUI. To build Fldigi, you will need the build-essential
meta-package installed, but this is the default for recent versions of Raspbery Pi OS.
Getting the Source
The Fldigi website has
links to download the various source packages.
Here we will build Fldigi and Flrig, which are the packages I use the most. We'll also
build the hamlib package which is available from
its own GitHub page. The files to be downloaded include:
hamlib-4.3.1.tar.gz
flrig-1.4.5.tar.gz
fldigi-4.1.22.tar.gz
The development of Fldigi is very active, so the newest versions may be higher
than those shown here. These are the versions I have used on the hardware so
far, although newer versions will almost certainly work as well. If you
use a newer version, don't forget to use the newer version number in each of
the steps below.
Place all four files in your home directory on the RasPi, which is probably /home/pi.
Preparing for the Build
One step that I like to perform before building software on Linux is to set some
compiler optimization flags, so that the compiled code will be the most efficient
for the RasPi. Recent versions of GCC allow you to set the flags to
automatically select the best values at runtime. To do this, run these
commands in the terminal before proceeding:
export CXXFLAGS='-O2 -march=native -mtune=native'
export CFLAGS='-O2 -march=native -mtune=native'
When the native architecture keyword is used, GCC will attempt to determine
the best architecture flags dynamically at build time. This prevents having to
guess at the best target architecture. This step also works on PC-based builds,
as well as on the RasPi.
Note that the option -O2 is dash-oscar-two, not dash-zero-two. The
capital letter 'O' option tells GCC to generate optimized code whenever it can,
and the number tells it how aggressive to be when finding things to optimize.
The -O2 option is considered safe on all production CPU targets, so that's
what I use for my builds.
Changes to the CFLAGS and CXXFLAGS need to be entered before building packages,
in order to have any effect. Setting the CFLAGS and CXXFLAGS is
not required, but it does yield machine code that is better optimized
for the RasPi CPU.
Prerequisite Packages
The Fldigi build process requires a number of prerequisites. These include GUI, image,
and sound libraries, among others. The process described below also requires that you
build an XMLRPC library written by the Fldigi team, as well as a recent version of the
hamlib radio control interface library. Installing and building the
prerequisite packages should be done at a command prompt, most likely a terminal.
First, we will install the prerequisite system packages. These are packages that are
maintained by the Raspberry Pi OS team, and can be installed using apt-get. The only
requirement is that the RasPi needs to have some kind of Internet access, so it can download
the packages from the Raspberry Pi OS repositories.
At a terminal prompt, run the following commands, one after another.
sudo apt-get update
sudo apt-get install libfltk1.3-dev
sudo apt-get install libjpeg9-dev
sudo apt-get install libxft-dev
sudo apt-get install libxinerama-dev
sudo apt-get install libxcursor-dev
sudo apt-get install libsndfile1-dev
sudo apt-get install libsamplerate0-dev
sudo apt-get install portaudio19-dev
sudo apt-get install libusb-1.0-0-dev
sudo apt-get install libpulse-dev
sudo apt-get install libudev-dev
sudo apt-get install texinfo
Also, if you are building for a recent Debian
desktop or server version, you may need this package instead of the libjpeg9-dev
package:
sudo apt-get install -y libjpeg62-turbo-dev
Not all of the above packages are required for all configurations of Fldigi, but all of
them should be safe to install, whether you use the associated features or not.
Some of these packages may already be installed. If any of these commands responds
with "package is already the newest version", just skip to the next one.
Some of these packages may have other dependencies, so each command may install more than
one package. This is normal, so just sit back and watch it all install.
First, we'll build the hamlib package, just like with the XMLRPC package.
While the Raspberry Pi OS distribution includes a build of hamlib, it is rather
old, and doesn't include many radios from the last several years. So when I build
Fldigi, I build a more recent version of hamlib, to run my newer radios. First,
make sure that hamlib isn't already installed:
sudo apt-get remove libhamlib2
If this gives you a message saying that the package wasn't installed, you're done. Otherwise
the system will prompt you to uninstall the package.
Then we build its replacement:
tar -zxvf hamlib-4.3.1.tar.gz
cd hamlib-4.3.1
./configure --prefix=/usr/local --enable-static
make
sudo make install
sudo ldconfig
cd ..
At this point, the packages needed to build any of the Fldigi family of programs should
be available on your system.
Building Flrig
Next, let's build Flrig. As before, run the following:
tar -zxvf flrig-1.4.5.tar.gz
cd flrig-1.4.5
./configure --prefix=/usr/local --enable-static
make
sudo make install
cd ..
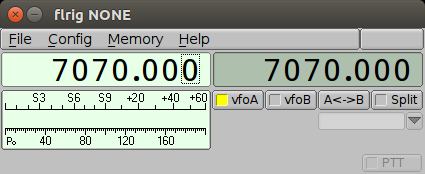
Flrig is self-contained, so you should be able to run it already, even though we haven't
yet built Fldigi:
flrig
Which should result in the Flrig root window:
Building Fldigi
Finally, we build Fldigi itself. Let's do this in two steps. First, extract the
source and configure it, as we did with the other packages:
tar -zxvf fldigi-4.1.22.tar.gz
cd fldigi-4.1.22
./configure --prefix=/usr/local --enable-static
At this point, it's a good idea to verify that the configuration script was able
to find all of the supported libraries. You should see this towards the end
of the configuration process:
Configuration summary:

  Version ..................... 4.1.22

  Static linking .............. yes
  CPU optimizations ........... none
  Debugging ................... no

  fldigi ...................... yes
  flarq ....................... yes

  i18n ........................ yes

 fldigi build options:

  sndfile ..................... yes
  oss ......................... yes
  portaudio ................... yes
  pulseaudio .................. yes

  libmbedtls .................. internal lib
  flxmlrpc .................... internal lib

  hamlib ...................... yes
Note that the fldigi build options section items all show yes or
external lib. This is what you want. If something in that
section shows as no, you'll have to do some troubleshooting to see why
the associated library wasn't picked up. Also, note that
CPU optimizations shows as none, even if you set CFLAGS and
CXXFLAGS as described above. This is normal, and any custom CFLAGS and
CXXFLAGS values will be used during the build. Once you are satisfied with
the configuration, go ahead and build:
make
sudo make install
cd ..
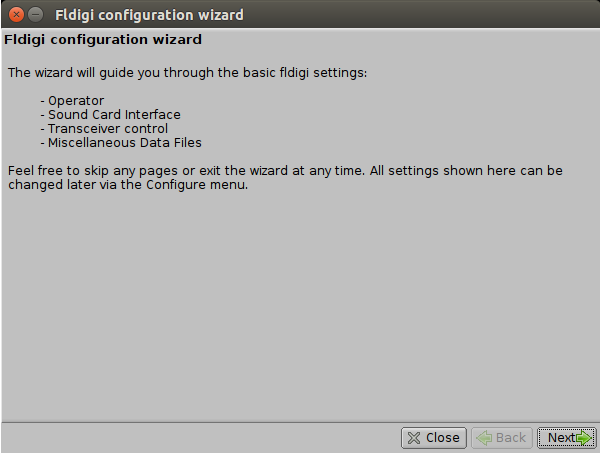
At this point, Fldigi is installed, and you can run it from the command line:
fldigi
...which should result in an initial configuation window:
Initial Configuration
My suggestion is that you only fill in basic configuration options during the first
startup, e.g., enter your callsign and basic information, but don't try to configure
soudcards, radios, PTT, etc. Once you get the Fldigi root window, exit the
application to save the basic configuration. Then start Fldigi again, and start
working on configuring hardware. The reason I say this is that Fldigi, as great
as it is, can be rather buggy when configuring hardware options, and if a setting
causes Fldigi to crash, you don't want to lose everything else you configured.
This can be even more important on a resource-constrained machine like the RasPi.
If all goes well, you should be rewarded with the Fldigi main window:
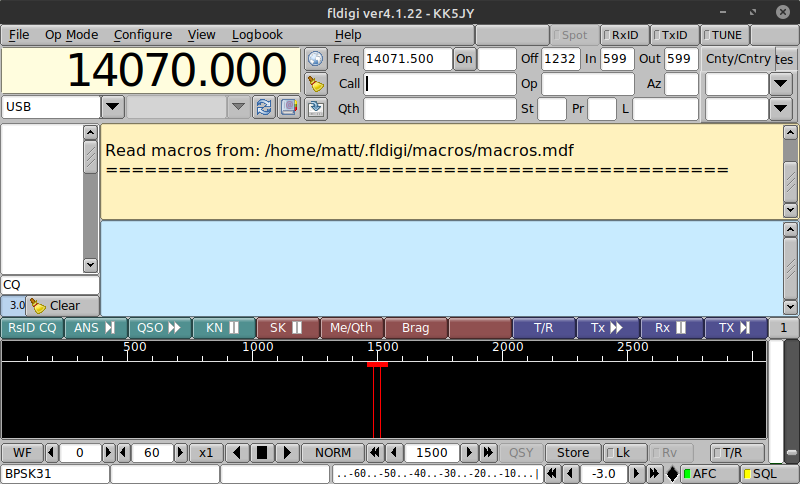
Configuration of the various options of Fldigi is well outside the scope of this
article, but the current help pages
can be found on W1HKJ's website.
The Raspberry Pi, like many SBCs, is a hobbyist board. If something goes wrong, you may
have to do a little troubleshooting to figure out what needs adjustment. Hardware in
particular can be a bit of a challenge, finding serial ports, sound card names, etc. Don't be
afraid to experiment.
A Note on Serial Devices
Nearly all serial devices (used for radio control) on modern machines are USB-to-serial
converters. This includes radios that have a dedicated USB port for such purposes.
The serial drivers on most Linux distributions, including Raspberry Pi OS, tend to assign
hot-plug USB devices to one of the /dev/ttyUSB* device nodes, and those devices are
normally owned by root and the dialout group. In order to access
such devices for radio control, the user running Fldigi needs to be a member of the
dialout group.
Assuming you are logged in as the default user of pi, adding permissions to
access serial devices is as simple as running:
sudo usermod -a -G dialout pi
...at a terminal prompt. That tells Linux to add the user pi to the
group dialout. In order for that change to take effect, you need to
either reboot, or logout and then login again.
In order to determine the USB port name assigned to your radio, I have found that
the easiest thing is to start the machine with the USB device disconnected, then
once you have logged in, connect the USB device, and then immediately run the
command:
dmesg
This will produce a lot of output, but the serial port assigned to your radio
should be one of the last things displayed. For example, this is the output
of dmesg when my Kenwood TS-590SG is connected:
usb 1-5: new high-speed USB device number 8 using xhci_hcd
usb 1-5: New USB device found, idVendor=0424, idProduct=2512
usb 1-5: New USB device strings: Mfr=0, Product=0, SerialNumber=0
hub 1-5:1.0: USB hub found
hub 1-5:1.0: 2 ports detected
usb 1-5.1: new full-speed USB device number 9 using xhci_hcd
usb 1-5.1: New USB device found, idVendor=08bb, idProduct=29b3
usb 1-5.1: New USB device strings: Mfr=1, Product=2, SerialNumber=0
usb 1-5.1: Product: USB Audio CODEC
usb 1-5.1: Manufacturer: Burr-Brown from TI
usb 1-5.1: ep 0x85 - rounding interval to 64 microframes, ep desc says 80 microframes
input: Burr-Brown from TI USB Audio CODEC  as /devices/pci0000:00/0000:00:14.0/usb1/1-5/1-5.1/1-5.1:1.3/0003:08BB:29B3.0004/input/input21
hid-generic 0003:08BB:29B3.0004: input,hidraw3: USB HID v1.00 Device [Burr-Brown from TI USB Audio CODEC ] on usb-0000:00:14.0-5.1/input3
usbcore: registered new interface driver snd-usb-audio
usb 1-5.2: new full-speed USB device number 10 using xhci_hcd
usb 1-5.2: New USB device found, idVendor=10c4, idProduct=ea60
usb 1-5.2: New USB device strings: Mfr=1, Product=2, SerialNumber=3
usb 1-5.2: Product: CP2102 USB to UART Bridge Controller
usb 1-5.2: Manufacturer: Silicon Labs
usb 1-5.2: SerialNumber: 05670041F5D2
usbcore: registered new interface driver usbserial
usbcore: registered new interface driver usbserial_generic
usbserial: USB Serial support registered for generic
usbcore: registered new interface driver cp210x
usbserial: USB Serial support registered for cp210x
cp210x 1-5.2:1.0: cp210x converter detected
usb 1-5.2: cp210x converter now attached to ttyUSB0
Note that the USB connection detects two devices. One is the sound
device used for digimodes, and the other is the serial device used for radio
control. The last line shows the name of the serial device, ttyUSB0.
When using this serial device in Fldigi, the correct device name to use is
/dev/ttyUSB0.
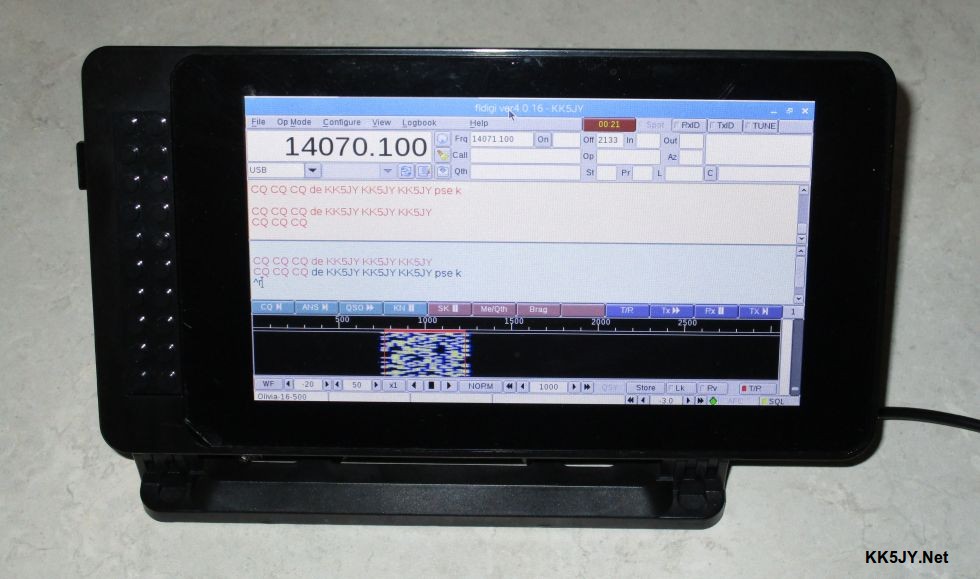
QRP for Computers
The Fldigi package can be quite capable for low-power operations. I
have run contests using Fldigi on the RasPi 3, while portable in a state
park, and it is a very rewarding experience to be able to do digital modes
without a full-sized computer. Below is a picture of a RasPi3 with
an
official RasPi touchscreen,
and custom enclosure,
running a recent build of Fldigi.
Such a device can be easily combined with any kind of USB or
Bluetooth keyboard.
Since the screen is a touch-screen no mouse is needed (although adding a
companion USB or Bluetooth mouse is also easy).
This could be used in a "go kit" for digital mode operation
on the road, from a park, while camping, etc. Also quite handy are the
"pi-top" kits,
which can hold a RasPi3, and provides a screen, mouse, and keyboard. This
is another great way to put together a compact, low-power digimode kit for
operation away from home. They even come in some creative
alternative color schemes.
What About Older RasPi Boards?
The build instructions above will work with any recent Raspberry Pi OS release, and
those releases will run on several different versions of the Raspberry Pi
hardware. My preference is to run the Fldigi software on a recent version
of the RasPi hardware, such as the
2B, the
3B, or the
3B+.
These are all multi-core machines that have the needed clock speed to exploit
the Fldigi software with good responsiveness in most cases. However,
recent versions of Fldigi are sufficiently lean that they can operate on
the earlier single-core machines, such as the
1B+,
at least with certain modes. I found that the 1B+ could run Fldigi with
many simpler modes such as PSK31, and even Olivia, and Contestia. I was
even able to run flarq,
the ARQ-like application in Fldigi, to send mail back and forth between a RasPi
1B+ and another PC.
The 1B+ board did not have the computational power to run modes
like DominoEX or Thor with the current versions of Fldigi. This may change
in the future, but the current code is just to heavy for some modes. If
you want to run Fldigi on a slower RasPi, my suggestion would be to turn off
unneeded features like the multichannel browser, and to minimize others, such
as running the waterfall in SLOW or PAUSE mode, to conserve computational
cycles. The less load you place on the software, the more able it is to
faithfully run your selected mode.
If your goal is only to run flarq, or another Fldigi-dependent application that
uses Fldigi as a modem, it might also be beneficial to run Fldigi in its minimal
mode, which only shows the waterfall. To run Fldigi this way, use this
command line:
fldigi --wfall-only
If supported by your sound card (or the sound device built into your radio),
it might also help to lower the sample rate used by Fldigi, so that all of
the DSP algorithms process fewer samples per second. The Fldigi manual
talks about sample rate selection
here,
and is very mode-dependent. Note that not all sound devices support
arbitrary sample rates. Some devices only support one or two rates,
and cannot decimate to lower rates. It may be beneficial to experiment
with different rates, to determine which ones have the best performance and
the lowest CPU consumption for your preferred modes.
In the end, unless you need extremly low power consumption, it doesn't make
much sense to use a 1B+ board, when the 3B+ boards are very competitive in
cost, and have far more power and responsiveness. Using an older board
can be a fun challenge if you happen to have one handy, but if you are
shopping for a new RasPi for digimodes, the 3B+ is the way to go.
As always, have fun!
Copyright (C) 2017-2022 by Matt Roberts, KK5JY.
All Rights Reserved.